We’ve avoided doing any blog posts for 2.5 months. It’s not that we don’t want to; we’ve just been busy with life.
Things we’ve been up to:
- re-glazing storm windows
- rebuilding window sills
- finishing the main family bathroom
- getting insulation added to the attic
- preparing to have some missing radiators connected
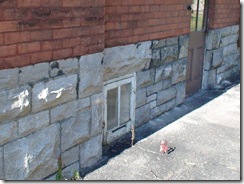
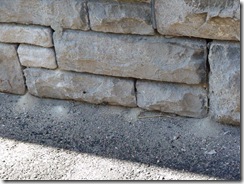
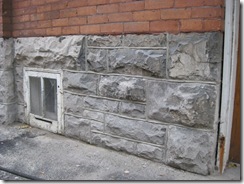
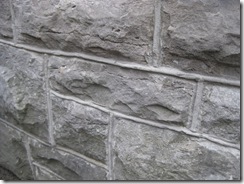
- getting our foundation repointed
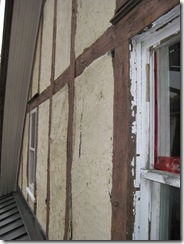
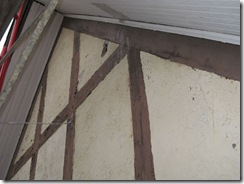
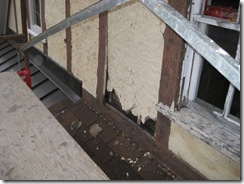
- getting quotes for stucco repair
- opening up our fireplace
- planning for the rear school-building renovation next year
The storm windows are coming along. I’ve got about 10 of them in the back workshop almost ready to be installed. I’m waiting for the glazing compound to firm up a bit more so I can prime before putting them up. I still have 4 more storms to build from scratch but have been procrastinating buying the wood…
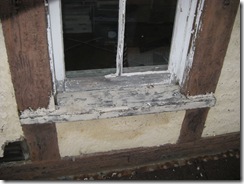
I’ve rebuilt two window sills up on our third floor. Most of sills are stone, but the ones that are in the roof gables are wooden and in bad shape. I used the products LiquidWood and WoodEpox. LiquidWood penetrates into rotten wood to waterproof and prevent further rot. WoodEpox is a putty. I was going to do a detailed post on this, but there are a lot of other people who have done just that ('tis the season for window repair), so I won’t bother.
The bathroom is coming along, but slowly. The tub is in now, we pretty much just have to tile. We haven’t bought the marble yet, but will soon. More to come on that soon-ish.
We had our attic insulated. We had about 1” of old cellulose insulation previously. The insulation guys came and added a lot more, so we are up to R-51. They also filled the knee-walls on the third floor, added more to the other walls (via the attic since our house is balloon framed), and did the ceiling in the sun-deck off the den. We’ll notice more of a difference once the really cold winter hits, but it seems warmer and less drafty already. They also built us a proper attic hatch so we don’t have a huge gaping hole in the closet.
The plumbers are coming next week to re-attach three radiators that we’ve had off since last winter and replace a pipe that looks very close to springing a leak due to rust. The rads are for the main family bathroom, one in the butler’s pantry, and one in the dining room. Two were removed due to having to demolish the walls around them when the plumbers did the replacement of galvanized supply piping. The one in the dining room was taken off because the flooring under it had to be replaced (it was rotten from a leak). It will be interesting to see what this winter will be like with those three working again. We found those areas too cold last year.
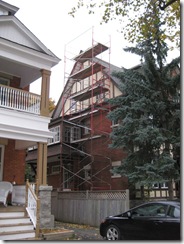
I found a guy on craigslist.org that was offering masonry services at ‘reasonable’ rates. We weren’t planning on having our foundation repointed this year due to the cost, but I figured I’d have him come out to give us a quote. His quote was 75% cheaper than the next best quote, so I hired him and had him do a small section first so I could inspect his work. He showed up with the correct mortar for the period of our house and his work was clean and well executed. He also offered to repair sections of our stucco with a traditional lime, portland cement, sand mixture, so we’re preparing to have him do that before the really cold weather hits.
We removed the coal insert from our fireplace to expose the firebox. We had installed a lock-top damper on the fireplace flue earlier this year (since we don’t have a damper or smoke shelf in the fireplace). We had conflicting opinions on whether the fireplace could be used. We had two WETT-certified fireplace professionals come in earlier this year. One of them said that they didn’t think we should use it because the flue didn’t look in good shape and then he tried to sell us an expensive gas insert. The second guy said it looked in good condition but suggested a smoke bomb test to verify that the smoke was well contained in the flue. We had some smoky smells in the bedroom above the fireplace when we had our first fire. We’ve decided to open up the closed fireplace in that room (it’s been closed off for many years) and do a complete smoke bomb test before using the parlor fireplace again. If it’s not completely safe, then we’ll have an insert put in and try for a wood fireplace on the second floor or in a future renovation somewhere else in the house.
This post is getting long, but I wanted to throw something in about our planned renovations for the rear school buildings. Our son is getting to the age where we want him to have a yard to play in. If you’ve been following our blog, you’ll know that the entire back of our property is filled with two large buildings. The total dimensions are 53’ wide x 30’ deep. So, we currently have no backyard. One of the buildings is the original 2-story coach house and is in a terrible state. The roof needs replacing and there is some mold in the wood framed walls. It’s damp and there are animals in the upper level (raccoons, squirrels). The other building is a single-story flat-roofed concrete ‘bunker’. It’s in pretty good shape, has its own bathroom and furnace (disconnected currently).
Our plan is to take down one of the structures at the back next spring so we can restore half our backyard. The other structure will stay and be converted into usable space. We will need a demolition permit from the city and permits to properly renovate the remaining building. So, we hired an architect to do plans for us and had a survey done of our property to make sure we didn’t need to apply for any variances. The survey went well, no variances, yey! And the architect is busy working on plans and coordinating with the city (which seems very supportive of our plans so far). I’ll refrain from posting our plans until we get city approval, which will hopefully come later this year or very early next year. Our plan is to apply for permits for the demolition, work on the remaining building, and some kitchen renovations all at the same time, with the expectation that we’ll just do the demo-work next spring and see how the budget goes on the remaining items. It’s easier to get all the approvals in place at once, and the city is ok with work being done slowly as long as there is some progress to report on every six months. With any luck, next spring (once the snow clears), we’ll have a sizeable yard to enjoy!
I’ll get some pictures up when I can. We’re in rush mode now until the snow hits, then I think things will slow down enough to sort through the photos and do some more detailed posts.
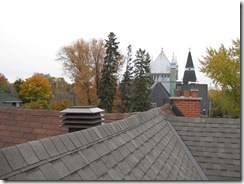
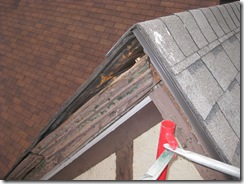
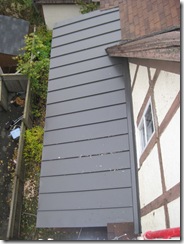 The top peak that needs to be repaired to prevent birds from entering our attic (it’s worse than I thought):
 Here are a couple pictures of the stucco that needs repairing:
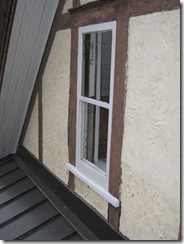 Here’s the other window sill that has been epoxied and filled, but not sanded or painted yet (it’s on the list). The storm for this window was just reglazed and is awaiting installation so I can remove the double-hung for additional repair: