Tuesday, July 28, 2009

Making Windows… Part 2

This is a continuation of my previous post.  In this post, I will complete the window up to the point of dry-fitting.  When we left off, we had four 25” long 2”x1 1/4” pieces of wood.

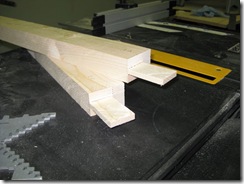
After cutting to size and marking which pieces were to be used for rails and which for stiles, the next step is to mark the tenons on the rails.  When doing a mortise and tenon joint in a corner joint, such as a window or picture frame, it is important to cut an additional shoulder in the tenon.  This is referred to as a haunched tenon.  If you don’t do this, then the entire side of the tenon will be visible on the outside edge of the window, which reduces strength and looks bad.

Here are the haunched shoulders marked on the rails:

IMG_1377

Now, we’ll setup the table saw for cutting the tenons.  Here is my table saw with the supplied miter attachment:
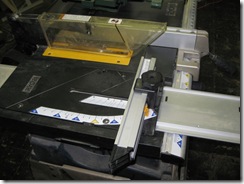
IMG_1381 We remove the miter attachment and put in my home-made t-groove track attachment:
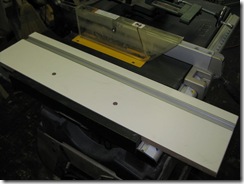
IMG_1384 This is a 28” x 8” 3/4” thick piece of MDF left over from a previous kitchen update.  I plunge-routed the groove for the t-groove track and two bolts.  The t-groove piece I bought from a local tool shop.  Now we mount the tenon jig:
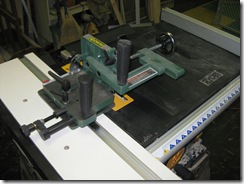
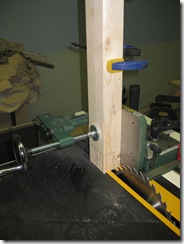
IMG_1386 Here is a pic of the tenon jig showing how it holds your rails:
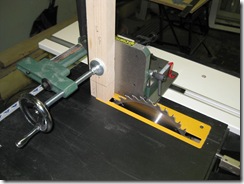
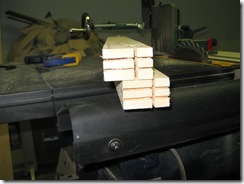
IMG_1389 This would be an incredibly tricky cut to do without a jig.  The jig has settings that allow you to align everything so you get precise shoulder cuts.  Here are the rails with the shoulders cut:
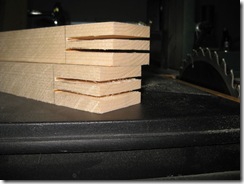
IMG_1392You can see  how poor my saw blade is.  I need to get the new finishing blade on soon.  Next we mount the rails back in the jig to cut the haunched shoulder:

IMG_1393

IMG_1397

Now, we remove the jig, and setup the blade to remove the shoulder material.
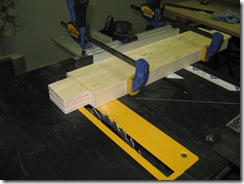
IMG_1398 IMG_1400 Typically, some clean-up will need to be done once the tenons are cut.  You can use a rasp, wood file, or sharp chisel to clean up your edges.  I will wait to do that until after my mortises are cut so that I don’t remove too much material.

Now, we’ll mark the mortises.  You can assume your tenons are perfectly situated on the rails (not likely), or you can mark the mortises using the tenons (which I did).  Here are the mortises marked:
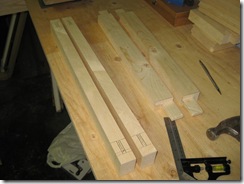
IMG_1403 Using the mortiser, I position the fence to accurately cut the mortise holes.  The mortiser will make a 1/4” x 1/4” square hole each time it plunges, so you have to move the workpiece along until the mortise is cut.  It’s a good idea to cut the two ends first with a scrap piece of wood beneath so that you avoid tear-out on the bottom with the through mortise.  Then, you can plunge the in-between holes most of the way through, flip the work piece over and plunge from the other side.  This gives a cleaner mortise.  Here are the mortises:
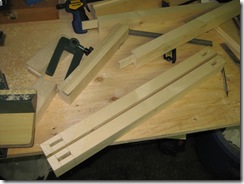
IMG_1405 Now, we do the first dry fit.  None of the edges have been routed yet, but this will allow you to adjust your mortises and tenons slightly (chisel, file, rasp) to get a good fit.  You want a tight, but not overly tight fit, because you want space for glue and the wood will expand with the glue.  Here’s the test fit:
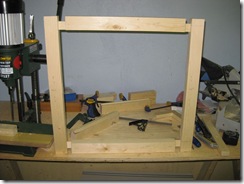
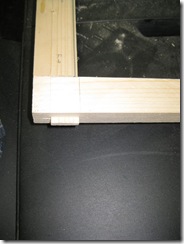
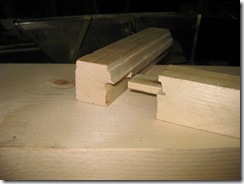
IMG_1406 IMG_1407 Here you can see one of the through tenons:
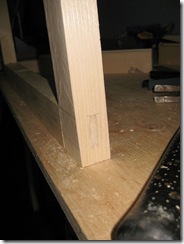
IMG_1408Now, we move onto routing the edges.  We start by using the coping bit, which looks like:
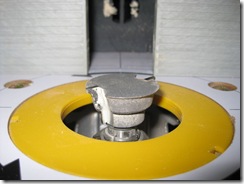
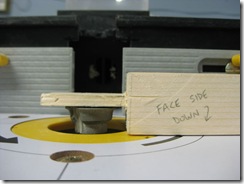
IMG_1409 You align the height so that the top of the bit is just touching your tenon, with the face side down.  You then align the fence so that it will cut 1/4” into the wood, like so:
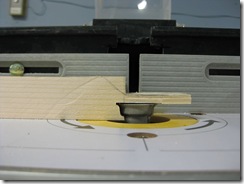
IMG_1411

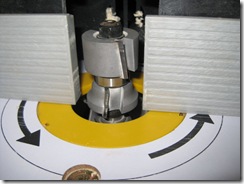
IMG_1414 After routing the coping cut on all 4 ends of the rails, you mount the sticking bit, which looks like:
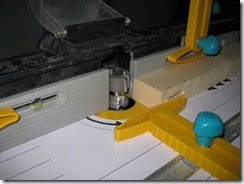
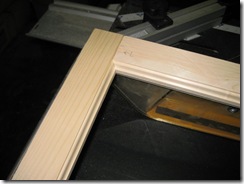
IMG_1415 You align the bit so that the sticking cut will have the same reveal and the 1/4” part in the middle lines up with the coped rail edges.  The fence aligns with the front of the bearing in the middle of the bit.  You then route all four inside edges (face side down).

Once that’s done, you can do another dry-fit.   You’ll note that the tenons come through further than the outside edge of the window.  This is because of the 0.5” overlap with the cope and stick cuts on the edges.  You can use a small saw or a table-saw (very carefully) to remove these.  It’s better to have your tenons come out the side and trim them, then to have them too short.

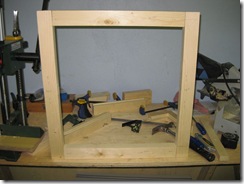
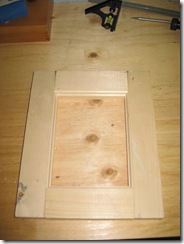
Here is the assembled window:
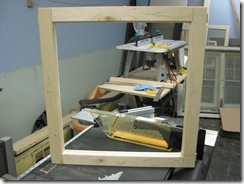
IMG_1417IMG_1421IMG_1423 Next up is doing minor tweaks to clean up where the pieces fit together, removing the excess wood from the tenons, then gluing, priming, and glazing.  Some of our windows have pinned tenons, meaning that a piece of wood or nail is driven into one of the window frame faces through the tenon.  This gives the joint even greater strength.  I’m not sure if we’ll do this or not with these smaller storms.

I hope I haven’t bored too many of you.  I struggled to find good instructions on the web for building the windows, and thought it might be useful for others if I tried to do a detailed step-by-step.

If you’re curious of the work effort involved, I spent 3-4 hours ripping the wood to the size I needed (I’m very slow when I have to use my table-saw without the guard), 2 hours doing the tenons, an hour to make the mortises, and another hour to do the routing of cope and stick cuts.  So, 8 hours for one window.  I think this time could be reduced by buying pre-milled wood in the basic thickness/width you need it, and doing more than one window at a time at each step, minimizing set-up and changing/aligning bits.  I think the effort is worth it though.  The end result is a strong, well-made window.  The tools will pay for themselves very quickly as well, given the cost of replacement windows.
Monday, July 27, 2009

Making Windows… Part 1

As I indicated in some previous posts, I’m making some wooden storm windows (and eventually some double-hung sashes) to replace those in our house that are either too far gone or missing.

Here’s a list of the tools I’m using:  a table saw, a router mounted in a router table, a mortiser (similar to a drill press), a tenon-jig (for the table saw), and some specialized router bits for making windows.

My table saw is a pretty cheap model from Ryobi, which came with a removable miter attachment with a non-standard t-groove.  The tenon-jig that I purchased requires a 3/4” t-groove, so I had to make my own table saw attachment to take the place of the original one.  More on that in a later post.

Here are some pictures of my router table, with one of the special router bits installed for making the windows:

IMG_1351IMG_1352

The bit as installed makes the ogee shape on the inside face of the window and the square groove on the other side for installing the glass (referred to as the ‘sticking cut’).  You can reassemble the bit for making what is called the ‘coping cut’ which is the inverse of sticking cut for where the rails (top and bottom of the frame) of the window meet the stiles (left and right sides of the frame), or you can buy an extra bit that will do the same job so you don’t have to repeatedly take apart and reassemble the bit.

Here are some pictures of a simple test frame I made out of some scrap spruce 2x4s:

IMG_1358IMG_1363

For a simple frame that doesn’t need to stand the test of time (like a picture frame, or small mirror, or something similar), this sort of construction would be sufficient, but the only thing holding it together would be the glue where the pieces fit together.  This would not be strong enough for a full-sized window that has to withstand both the challenges of weather, temperature differential (inside of house vs. outside), and being continually opened and closed.

For a strong window that can deal with all of these conditions, you need a mortise and tenon joint (or something similar).  There are other joinery methods that use dowels, biscuits, etc…, but one of the strongest joints is the traditional mortise and tenon.  Those terms sound fancy, but they just refer to the hole (mortise) and the thing that goes in the hole (the tenon).  There’s a really good reference on this type of joint here.

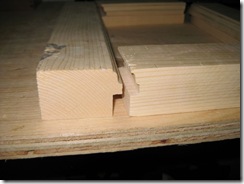
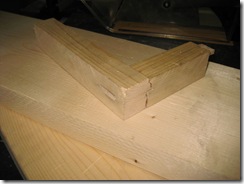
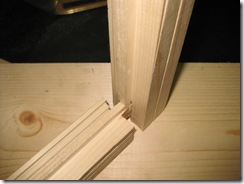
Here are some pictures of part of a test frame I built using a mortise and tenon:

IMG_1369IMG_1373IMG_1374There are several methods for making the tenon, including using hand-saws, a jig for a table-saw, or using router bits.  I opted for a jig to assist with making the ‘shoulder-cuts’.  Then you use the table saw without the jig to remove the rest of the material.  I’m going to do a more detailed post on making tenons later on.

For making the mortises, you can use hand tools (a special chisel called a mortising chisel), or you can use a plunge router, or a dedicated mortising machine.  The plunge router (or drill if you’re careful) don’t give you a nice square holes, so if you go with that option, you have to square the mortise, or round the tenon.  A dedicated mortiser gives you the nice square holes and is the ideal option if you’re making a lot of mortises (which I’ll be doing).

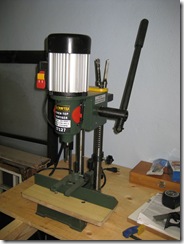
Here’s some pictures of the mortiser:

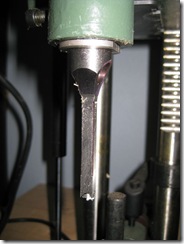
IMG_1354 A close-up of the bit:

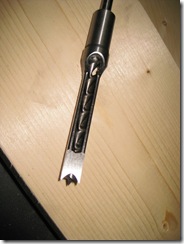
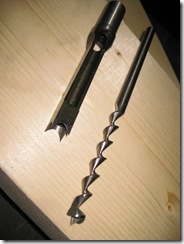
IMG_1355 The bit is actually two pieces, a hollow square chisel, and a drill bit that removes the material inside the chisel:

IMG_1356IMG_1357 The bits come in standard sizes.  The mortiser I bought came with 1/4”, 3/8” and 1/2”.  I’m using 1/4” mortises for our storm windows.

Now that I’ve reviewed the tools involved, I’ll lead you through my first real attempt at making a small storm window that is 22 1/2” (height) by 21 1/4” width.  It is a single-lite storm, so I don’t have to worry about muntins (I’ll do a post on those when I get further into making my windows).

I’m going to make this storm out of a spruce 2”x8” purchased from the local big box that I had lying around from another project.  Normally, you would purchase good quality wood from a proper mill.  My 2”x8” has some knots which you really want to avoid and it’s not the best quality wood.  A lot of wood windows are made of spruce, pine, or cedar.  Spruce and pine are fine for painted windows.  You can also use Mahogany or other finer wood species if you are staining the windows instead of painting.

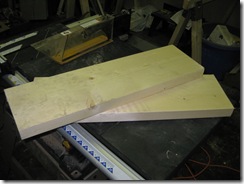
Here is my 2x8, cut into 2 25” pieces:

IMG_1353 I used my table saw to rip the raw lumber into 2” wide pieces, trying to avoid the knots in the wood wherever possible.  This gave me 4  2” x 1 1/2” pieces 25” long.  My storm windows have to be 1 1/4” thick however.  My interior windows are 1 3/4” thick, but the storms are a little thinner.  So, I had to rip 1/4” off of each piece.  This requires you to remove the guard on the table saw, which I hate doing, but I used protection for my eyes, stood to the side of the blade rather than right in front of it, and used push sticks to keep my fingers well away from the blade.

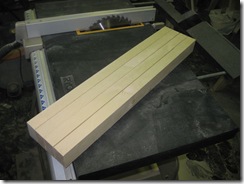
Here are the final pieces waiting to be cut to length:

IMG_1375 To give your wood the nice clean, straight, square edges it should have, you would ideally use a jointer/planer.  I don’t have one and have opted not to purchase one at this point.  For this window I am using a cheap ripping saw blade, but I have purchased a better quality finishing saw blade that should reduce the appearance of saw blade marks.  I may make a home-made jointer jig for my table saw as well depending on the results I get from the new blade when I get around to installing it.

Sizing the pieces for your frame is pretty simple.  The stiles (left and right of your frame) are the full height of the window (they will have the mortises).  So, they will be cut to 22 1/2” – 1/8” (you have to leave some room in the frame so the storm isn’t too tight), so 22 3/8”.  The rails are the width of the window (21 1/4” – 1/8”, same reason as above), minus the width of the stiles (2” x 2), plus the length of the tenons (2” x 2, since I am doing through tenons, meaning they pass all the way through the stiles), plus a 1/2” for the coping cut (where the cope and stick routed edges overlap).  So, the rails will be 21 5/8” in length.

I’ll end this post here.  My next post will show how to make the tenons on the rails, and I’ll follow that with the mortises, routing the cope and stick cuts, and then moving on to dry-fit, gluing, and eventually painting and glazing.

Friday, July 24, 2009

Constructive Carpentry and Inside Finishing

These are two titles of books published in 1912 by author Charles A. King.  The books are two in a series of five meant to be used for students studying carpentry.  The two “beginner” books prior to these advanced titles are ‘Elements of Woodwork’ and ‘Elements of Construction’.  The fifth book is a handbook intended for teachers.

‘Constructive Carpentry’ deals with the fundamental construction techniques that a carpenter would use to construct a house.  It outlines the basics regarding where to situate a house on a lot, foundations, damp proofing, brickwork, and chimneys, then discusses framing techniques (full, half, balloon).  Then follows a lengthy discussion on how to use a steel square, with lots of mathematical formulas.  There’s also a chapter on roof construction, boarding and outside finish, roof coverings, and plastering.

‘Inside Finishing’ is a treasure trove on detailing and interior finishes.  There is a basic intro on heating systems in use in 1912, some discussion on plumbing and ice-boxes.  Then comes a good chapter on floor laying and finishing that also discusses inside woodwork.  A chapter on doors, then another on windows follows.  Then comes stair building, which is a great chapter in my opinion as it discusses how to layout a stair design, headroom accommodation, stringers, posts, treads and risers, circular stairs, balusters and handrails.

A chapter on painting discusses how good quality paint contains lots of lead, which I found amusing and a bit scary.

The chapter on inside woodwork is great.  It discusses how wainscoting is prepared, how moldings and casing should be built, and has an interesting discussion on the necessity of closets for storing clothing and linens away from insects and vermin.

Obviously the writing style and much of the content is out of date.  There have been major advances in the areas of insulation, HVAC, plumbing, appliances, ventilation, etc…  But, I found it interesting how much of the content is still very relevant.  The hardwood floor discussions are pretty much inline with unfinished flooring techniques in use today.   And the care given to how to install doors, windows, and casing are very relevant, especially given the careless construction techniques in new builds these days.  Things like attention to the look of details, door opening height, and how to make the most of natural light are all topics that are often ignored in new homes.

I love the way the author and presumably carpenters of the day thought of the homes they built.  Phrases like ‘seasoning of the building’ are used, which treats the house as something that matures rather than deteriorates.  These people built homes to last generations and it shows in much of the detail in these books.  The writing also elevates the role of a carpenter to that of one requiring a very high level of intellect, with knowledge of mathematics, layout, and design, and an integral understanding of how other trades impact and integrate with carpentry.

The books are also inline with the modern concept of buying stock items.  Doors and windows in 1912 were not made by the house carpenter, but rather ordered as stock items or broken-down kits, and just assembled and ‘tweaked’ on-site.  This mass-production technique differs from homes built before the 1870s where much of the materials were still hand-constructed.

Anyone who owns an old home or cares to read up on how old homes were constructed should read these books in my opinion.  They are no longer in copyright, but you can pick up physical copies at Amazon if you want, or download them in PDF or other forms like I did. 

Here are the links to the PDFs:

Constructive Carpentry

Inside Finishing

Thursday, July 23, 2009

We’ve been busy

I haven’t been writing to the blog much lately.  We’ve been trying to take advantage of the sunshine (when we get it), and the longer days to get things done around the house.

We’ve had one disposal bin (20 yards) filled with debris left from our original renovations prior to moving in (the guttings of one bathroom, and all the misc stuff associated to upgrading plumbing and electrical).  We have another one sitting in the driveway waiting to be filled with the remainder of our debris which is sitting in one of the rear school buildings.

We’ve had some architects visit to give us opinions and quotes on reworking the use of the rear buildings.  More on that in another post to come.

We’ve heard back from MPAC (Municipal Property Assessment Corp) about our request for reconsideration.  We had to file one as our property was classified as a split residential/commercial and our taxes were insane.  There hasn’t been a commercial use of those rear school buildings in almost 20 years, and it wasn’t difficult to convince the inspector from MPAC that that was the case.  They reassessed our property on that basis and also gave us an additional reduction due to depreciation of the structures.  It dropped our taxes by about a 1/3.

In conjunction with the debris clear-out, I’ve setup a workshop in one of the rear school buildings.  I’ve also bought all the necessary tools to build new storms and wooden replacement windows.  My work-shop now includes:

A router table with 2HP router, special rail and stile router bits for making sash windows, 10” table saw (my old one) with a special jig for making tenons (my saw won’t support a dado blade so the jig is the best way to go), a dedicated mortising machine (which resembles a drill-press), glue-clamps, and all the tools for glazing glass.

I still have to pick up the wood to make the storms, but I’ve made some mock-ups using some scrap spruce with good results.  I’ll put together a post with some step-by-step pictures for those who are interested.

I’ve also found some really good reference books on c.1912 construction and finishing techniques.  Actually, they are books published in 1912 meant for students of carpentry.  I’ll do a post about that shortly.  They contain a huge amount of information about how and why homes in that period were built the way they were.

Stay tuned for some more posts…